
Hello all,
This week I
have a card I created for the TGIF Challenge blog,
This is my
first time ever entering a card in over at TGIF, and only my third ever card I’ve
created for a card challenge, so I must say I’m a bit nervous entering my card
in at TGIF as they have a star studded design team, but big girl pants on and
away we go…..
Now I’m not
really big on making Valentine’s Day cards but it gave me a great idea on how I
could
use two products I’ve been dying to play with that just so happen to be prefect for Valentine's Day.

use two products I’ve been dying to play with that just so happen to be prefect for Valentine's Day.

Back in December
I found a new love of mine - Embossing Paste!
I’ve been
dying to play with my
Dreamweaver Gold Metallic Embossing Paste, but it’s
very bold and one of those things where it only has a certain time and a place to
be used, but I finally found that perfect time. =)
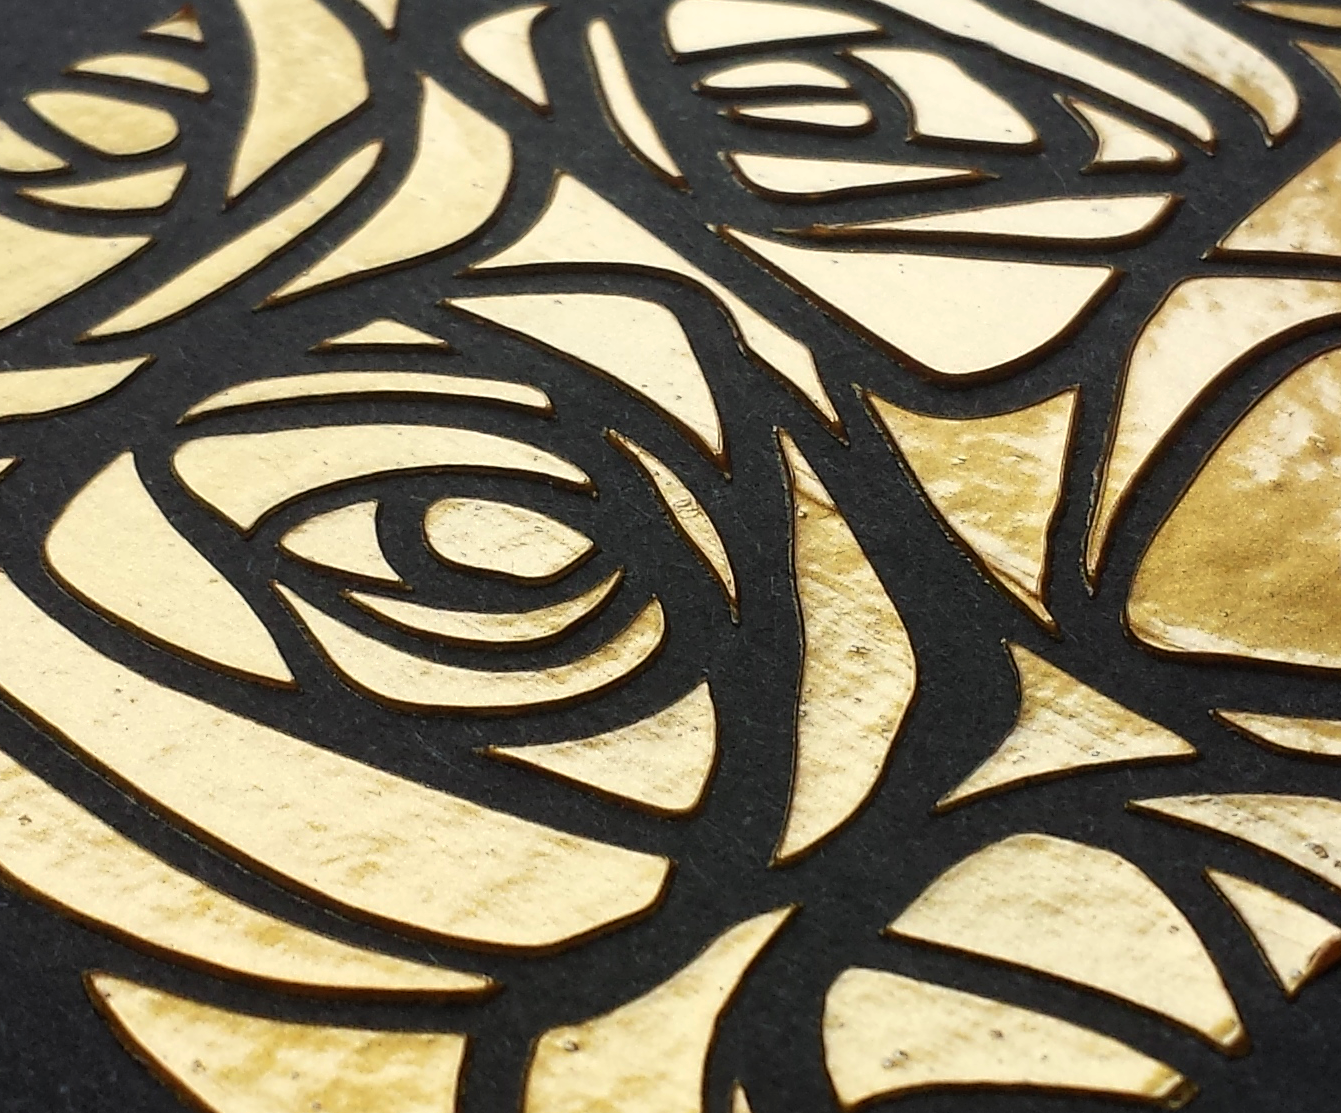
So I decided
to pair my Tim Holtz Layering Stencil - Scribbles with my gold metallic embossing
paste, every time I look at this stencil I instantly think roses not scribbles,
so I thought it would make a perfect Valentine’s Day card element, what says
Valentines better than a dozen gold roses!
I decided to
go with something I find really challenging, and that’s a one layered card.
I always struggle
with how flat my cards turn out and usually crumble and add another layer, but I
feel the texture from the embossing paste gave this card the dimension I wanted
to add without actually adding another layer.


So starting
off, I took a sheet of Basic Black cardstock and made an A2 top folding card.
Next using
the Tim Holtz Layering Stencil - Scribbles, I masked off a square area that I liked,
I then
placed my stencil on the card front and masked off any areas on the card I thought
might get embossing paste on it, i then taped down my stencil so it didn’t move
or shift, using my Palette Knife I then spread the Dreamweaver Gold Metallic
Embossing Paste all over the stencil, once I was happy with how it looked I carefully
removed the stencil and immediately washed the stencil and knife off.
I find that
the metallic embossing pastes take a little while longer to dry than some of the other
colours from Dreamweaver so I gave this card a good hour to dry before moving onto my stamping.

colours from Dreamweaver so I gave this card a good hour to dry before moving onto my stamping.

Using a
retired Stampin’ Up! stamp set called Good Greetings I took the “Happy Valentine’s
Day” stamp and stamped this with Versamark and heat embossed it with Ranger Super
Fine Gold Embossing Powder.
That’s my
card all done, very quick and simple but I really like how it turned out in the end,
This gold metallic embossing paste looks far more stunning in real life, when the sun hits it on different angles it has some stunning shades of gold show through, ranging from a deep gold to a very pretty rose gold.
This gold metallic embossing paste looks far more stunning in real life, when the sun hits it on different angles it has some stunning shades of gold show through, ranging from a deep gold to a very pretty rose gold.
I think the boldness
of the gold embossing paste on the black card base really makes this card pop.
I Hope you like how I used the gold metallic embossing paste and the
scribbles stencil together,
Thanks for stopping by and have a lovely week,

- SUPPLY
LIST -
Simon Says Stamp
Tsukineko -
Palette Knives Tools
Tim Holtz
Layering Stencil - Scribbles
EK Success -
Powder Tool Applicator
Ranger - Embossing
Powder Super Fine Gold
Dreamweaver Gold
Metallic Embossing Paste
....
STAMPIN' UP!
....
STAMPIN' UP!
No comments